Tuesday, June 26, 2012

Shabby House

Hello to all dear friends. Thanks for dropping by. Just want to share a project that I learnt to make during a crop session organised by my friend, Elaine. Its such a fun session. Lots of paintings, gluing, cutting and so on. This session is making "doll house"!!!!

From young, I always had a love for doll houses. And in my display cabinets, I had 3 doll house areas (a padlocked and forbidden ground for my kids, :P). ha ha... I wish I could make my own doll houses from scratch. But in Singapore, its so hard to get the cutting machine(or saw??) to make my own. So I bought all 3 doll houses and make my own decor or furnitures or food etc. I love doll houses!!!!!

So when my friend organised this session, I immediately signed up for it. Even though the doll house is made of paper, I love it!!!! I added some new elements to it as well. And here's my version of the shabby house:

Front view of house. All materials are provided by my friend except for some newly added elements. New elements added: My Little Shoebox girls.

Top View
I love this pink house. My fav color and no. 31 is my birthdate!! Note: the white flower pot is actually a cone, painted and inserted into the styrofoam base.

Loved this pavement. Made of wood circles and small pebbles. Hard a tiring job of sticking them down. But loved the end result.

 Note: the baseball bat and mitts are newly added in. Found them at a beads shop after the session.

 Little corner garden. Added the blue fake flowers. I love the fake leaves.

Thanks to another friend, Alice Choo, who gave me this tangling heart, I attached it to the burlap as a wind chime.
 New elements: My Little Shoebox girls and the laundry basket and its contents.


New elements: the wood table (I made) and the gingerbread men(bought it last year). And I love the broom too. Also thanks to Alice who made it "bushy" for me so it won't look so stiff and fake. : )

The laundry line. I made the wire hanger too. 

I had such a fun time creating this shabby house. My girl loves it too and she had requested me to make one for her. ha ha.. ya. She knows that this house is mine. :P Well, I will try my best to make another one for her to play with. Hopefully soon..

Had a rather busy day these few days as school had reopened and busy with my girl's schedule. Will try to post the 3rd Blog Candy as soon as possible. 

Hope you all will be inspired by this project. And thanks for supporting me thus far. Had a fun week!

Saturday, June 23, 2012

2nd Blog Candy Winner

Hi, friends. Thanks for the support!! I promised to draw a winner for the 2nd blog candy today.

And the winner is no. 3, Wee Von


Hi Carol, love your blog candy. Love your creativiness too. Don't know if this is still open, but if so, I would love to win. Thank you
ReplyDelete

Congrats, Wee Von. Please email me your address at ctlove2scrap@gmail.com.

I will try to post up my next candy for the "60 followers" reached by Monday. Do stay tune.

Thanks for visiting my blog. 


Friday, June 22, 2012

Frosted Designs Fab Friday Challenge - DIY Embellishments

Helloooo.... Its Fabulous Friday Challenge again at Frosted Designs!!! This week, we are challenging you to make your own embellishments and incorporate into your projects. This is such a fun theme!!! I'm sure all have had a chance to make your own embellishments before, like flowers, banners, crochets, chipboards and so on. And this week's sponsor is Oh My Crafts.

Here's the embellishments that I made:

1) Flowers and vines corner embellishment.
 I assembled the flowers myself before adding the vines and stamens(glued them all together). Made a few sets of these for future use.

2) Clay Angel
For the clay angel, I used Martha Stewart air-dry clay and a angel mold. Its so beautiful once done. Love the angelic and vintage look.

For all above DIY embellishments, I used them to decorate a denim pocket cut out from my old denim skirt.

Inside the pocket, I just cut out journaling cards from patterned papers. Going to use them to record my favourite quotes. Love how simple the design is and how the flowers corner just beautify the whole denim pocket without layering too much stuff.

Hope you will be inspired to create more of your own embellishments. It can be quite expensive to buy embellishments. Create more for future uses too. And remember to hop over to Frosted Designs to join in the fun once done.

Thanks for dropping by. Do also drop by My Little Shoebox for our Week 4 Blog Hop with The Twinery. Have a fun week.

Wednesday, June 20, 2012

My Little Shoebox and Twinery Blog Hop


Hi, friends. This week, My Little Shoebox and The Twinery had teamed up for a fun-filled week of blog hop showcasing projects by both company's design teams and of course, the attractive prizes. Today is the 3rd day. You must have come from Katarina Damm-Blomberg's blog.

It is so exciting to work with The Twinery's products. Their colours compliment My Little Shoebox's products so well. I love all the colours of their twines and its so hard to chose which to use.

Without further ado, here's my project that I done using My Little Shoebox's papers and The Twinery's twines.

"Home Sweet Home" Hanging Ornaments:

Supplies used: MLS papers - Keepsake (English Rose, Garden Delight, PIcture Perfect, Cardstock Sticker), Up In The Trees (Bird's Eye View, Free As A Bird, Heart On A String), Aiko (Little Princess, One Fine Day, Blue Sky, 3D roll up flower), Lovely Day (Happy Together, Let The Sunshine); MLS mini alpha stickers, The Twinery's Twines, pink plastic beads, styrofoam balls, foam dots, Beacons glue

I used the twines to make into tassels, cover the styrofoam balls and as strings to hang up the ornaments. I love how the twines add to the "cuteness" and "sweetness" of My Little Shoebox papers.

For this blog hop, we have some prizes up for grabs:
From The Twinery:
Four Spools of baker's twines in your choice of colours

From My Little Shoebox:


In order not to miss the chance to comment on each blog to be entered to win our fantastic prizes, here's the hop order and links you need to follow:

Wednesday, June 20


Carol Theng <---------You are here


If you have missed the past 2 days's blog hop, you can just drop by My Little Shoebox for the master list. Now its time to head over to Natalie Clause's blog. Thanks for stopping by. Have a fun-filled week.

Tuesday, June 19, 2012

2nd Blog Candy & Winner Revealed for Frosted Designs Blog Hop

Hi, everyone!!! Thank you to those who followed my blog. I have reached 40 followers!!!!!! yeh!!!!! Its time for the 2nd blog candy draw. For those who haven't commented, please go here to comment to win this candy. Please comment by Thursday and I will draw out a winner on Friday randomly.

Here's what you will get:


And now its time to announce the winner for the Frosted Designs Crafting Space Blog Hop: The winner for the blog hop is Cat!!!!


Great space!! It reminds me of my own craft room- I frequently end up creating things on the floor rather than on one of the many other surfaces! Xx
ReplyDelete"

(Note: The first on the list is the winner)

Congrats, Cat. Please email me your address to ctlove2scrap@gmail.com. This is the prize you get:


Thanks for visiting my blog.

Monday, June 18, 2012

Published!!!!

Hello, friends. I'm so happy today. I received a happy mail from Paper Crafts Magazine!!!!


And my published work is on page 55:


It's my first publication!!!!! So happy!!! So thankful!!! Praise God for His provision and His creative gene!! All above except the pencil holder are my works. It's a very simple project using washi tapes from Made With Love. But the strange thing is: it's written in the supplies list as from American Crafts but I wrote from Made With Love. Hmmm... anyway, I just feel very happy and honoured to be chosen. Thanks, Paper Crafts Magazine.

Another view of my work:
Here you can see that I also label the pencil box with stickers. And I made a set of 3 cards and 3 bookmarks.

Hope you will be encouraged to submit your projects too to Paper Crafts Magazine.Their call for January/February 2013 Call For Submissions is open. Do hop over and join in.

Have a great day. Thanks for visiting my blog.

Saturday, June 16, 2012

Frosted Designs Crafting Space Blog Hop

Hi, everyone. Thanks for dropping by. Today we have a blog hop on Frosted Designs designers' crafting spaces. You can find inspiration and tips on organising your space.This blog hop starts from Frosted Designs. You should have come from Lori M's blog.

And here's my messy crafting space:

This is a temporary space used as my crafting room. When my son grows older, this room will be his!!!! Oh my!!! Ha ha.. Here, you can see its really very messy!!!! The square table  is my main crafting table.

This is my very first crafting space before it spill over to rest of the room. But now, it seems to be my display table for my crafts. I ran out of display space. Another messy table!! :P

This wardrobe was originally for our travel winter clothes. But now 99% belongs to my craft supplies!!! wahaha.... As you can see, I'm not a very neat crafter. I try to squeeze in as much as I can into a space, hence the messiness. I store my ribbons, trims into the 2 drawers, the bottom one for spools of ribbons, above for loose ones on ribbon cards. I love using hanging pockets. The 2 blue pockets on the doors are used to store my Prima flowers, some embellishments. I also store my cardstocks and some papers here. The chest of plastic drawers are used to store my embossing powders, embossing folders.

These hanging pockets are used to store loose ribbons, Prima flowers. Bought all these pockets from Daiso.

More of my papers, Sizzix dies and magazines are stored here in one of the bookshelves.

My main crafting table. This is where I do most of my painting, scrapping. But I found that the floor is my best table!!! ha ha...

 My favourite spot in the whole room. On the left, the chest of drawers are used to store my thin dies, stamps, inks, some paints. On the right, the white wire "baskets" are my most favourite areas. They store my art mediums and mists.

I love the white wire "baskets". It allows me to store all my mediums at one place (it used to be all over the place).

I also love this stackable pull-out trays. I can just take out one tray of inks and carry them with me to my table.


These plastic drawers are used to store my stamps, inks, some paints and thin dies. The 37L storage container with rollers, below the table contains all my punches.

And here are my punches!!! still got room for more!!!!

Here you can see that I store some of my stamps (other than those in the plastic drawers) in these plastic boxes.

Well, hope you won't be put off by the messiness of my crafting space. Thanks for viewing. Oh, I have a prize to offer for this blog hop. Just leave a comment on this post and I will choose the winner randomly on Monday.


Now you should head over to Channa's blog.

In case you get lost along the way, here's the line-up of this blog hop:

And lastly back to Frosted Designs.

Thanks for hopping over. Have a fun time organising your room.

Friday, June 15, 2012

Featured in "Best of the Web" at Craft Corners


Hi again, I want to share another exciting news. My blog is featured in "Best of the Web" at Craft Corners. Its such a surprise and honour to be featured. Thanks so much to Craft Corners.

Do hop over to Craft Corners to have a look at their different crafts tutorials, tips, feature etc. They also have a Tip Center where you can find shopping tips, baking tips, buying advice and more.

Thanks for visiting my blog. Have a nice weekend. Hope I can share more of my projects next week. See u!!

My Little Shoebox Warehouse Sale 2012

Hello, friends!!! I just came back from Church Camp in Malacca, Malaysia. Had a great time!!

Today I want to share an amazing news: My Little Shoebox is having a warehouse sale.
Each goodies box is filled with over 100 pieces of My Little Shoebox goodies at US$29.00 only!!!! So hurry over to My Little Shoebox's shop to grab the good deal!!!


thanks for visiting my blog.

Saturday, June 2, 2012

My Little Shoebox and Punky Sprouts

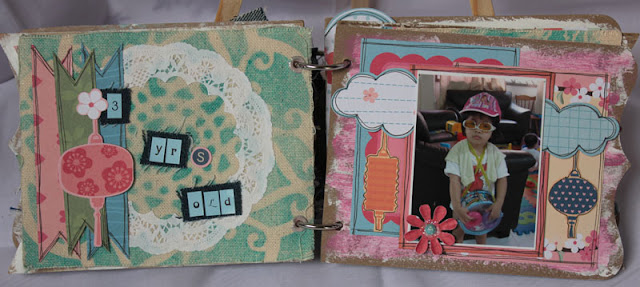
Hello!! Just wanted to share my project at My Little Shoebox. For May, we had a product swap with Punky Sprouts. And I got to work on their Teenie-Beanie Sprout album. And here's what I have done:

"Six Wonderful Years"

This Punky Sprout album is made up of chipboards, corrugated boards and canvas.

For the cover, I played with gesso and Faber Castell Big Brush Pens. Included with the album are the blue twine, cupcake liners (which I made into a flower combined with My Little Shoebox 3-D flower) and denim strips (which I used to mat the title "Six" and also tie around the rings).

For these pages, I painted over with gesso as well. I tore away the surface of the corrugated board (banner shaped) to expose the inside and paint over with gesso.

Here, I masked and misted the canvas using Tattered Angels glimmer mist. Die-cut the MLS paper and use the negative to frame the canvas.

I used the same masking and misting for this side of the canvas as well. Also painted the background of another page with gesso and acrylic paint.

For the rolled flower, I used the denim strips provided and paired with MLS 3-D flowers.

I made a pocket on this side of the canvas to store additional journaling notes. And I combined the banners from MLS(paper banner) and Punky Sprouts(denim banner). Again I tore the surface of the corrugated board.

I pop up the clouds in this last page.

The back cover of the album was converted into a clipboard using 7 Gyspies clipboard Clip. This is to store extra journaling notes or documents. I layered some MLS papers over the coat of gesso.


Supplies used:
Aiko - 11812 Little Princess        - 11813 Bouquet                  - 11814 Blue Sky
        - 11815 Festival                        - 11816 One FIne Day        - 11817 Happy Notes
        - 11819 Kiss and Sky                - 11811 3-D Roll up flower diecut
        - 11821 Cardstock sticker      - 11820 March                      - 08432 Mini alpha stickers - Sky
        - 08429 Mini alpha stickers - Brownie
Punky Sprouts Teenie-Beanie Sprout Mini Album
Cardstock (Bazzill)
Chicken wire template (The Crafter'sWorkshop)
Clipboard clip (7-Gypsies)
Gesso (Claudine Hellmuth)
Multi-medium (Claudine Hellmuth)
Acrylic paints (Claudine Hellmuth, Daler Rowney)
Glimmer mists (Tattered Angels)
Gelatoes (Faber Castell)

What I love about Punky Sprouts album is that there are different types of album bases: chipboards, canvas, corrugated boards and I get to try different techniques on each type. And I didn't really cover all pages with papers as I would love to "expose" their textures and show some of the "raw" surfaces. 

Well, I hope you are inspired to try out this album by Punky Sprouts. Do hop on over to My Little Shoebox to view the beautiful creations of our design team members. 

Thanks for viewing!!

Fabulous Friday Challenge - Punches

Hi!! For this week's challenge at Frosted Designs, we invite you to use punches on your projects.

And this is my take:

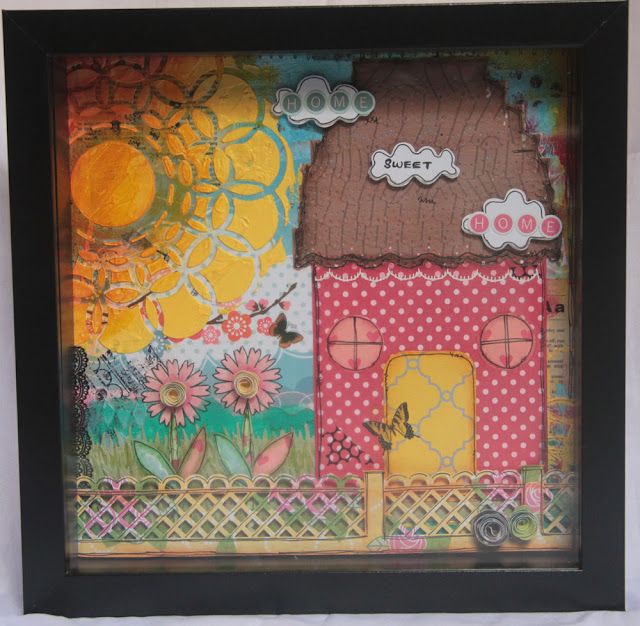
"Home Sweet Home" mixed media art


I used punches for the roof, flowers, circle windows, grasses and fence. For this project, I used papers from My Little Shoebox. Loved the stencil from Pink Paislee. Added alot of paints, multi medium, Faber Castell gelatoes, Big Brush Pens and Pitt Artist Pens, modeling paste, rubons. The shadow box is from Ikea.

Here's a closer look at the details:


And this week's sponsor is Artsy Albums. Do hop over to join in this wonderful challenge at Frosted Designs. Hope to see your creations!!

Have a nice weekend. Thanks for stopping by.